Choose a view and set the outer limits
A motorcycle is a useful drawing subject because its large shapes are easy to identify, while its smaller parts can test your ability to simplify. Begin with a clear side view if you can. A three-quarter view adds depth, but it also makes wheel placement and overlapping parts harder to judge. Use a reference image or draw from observation, and treat the first pass as a map rather than a finished outline.
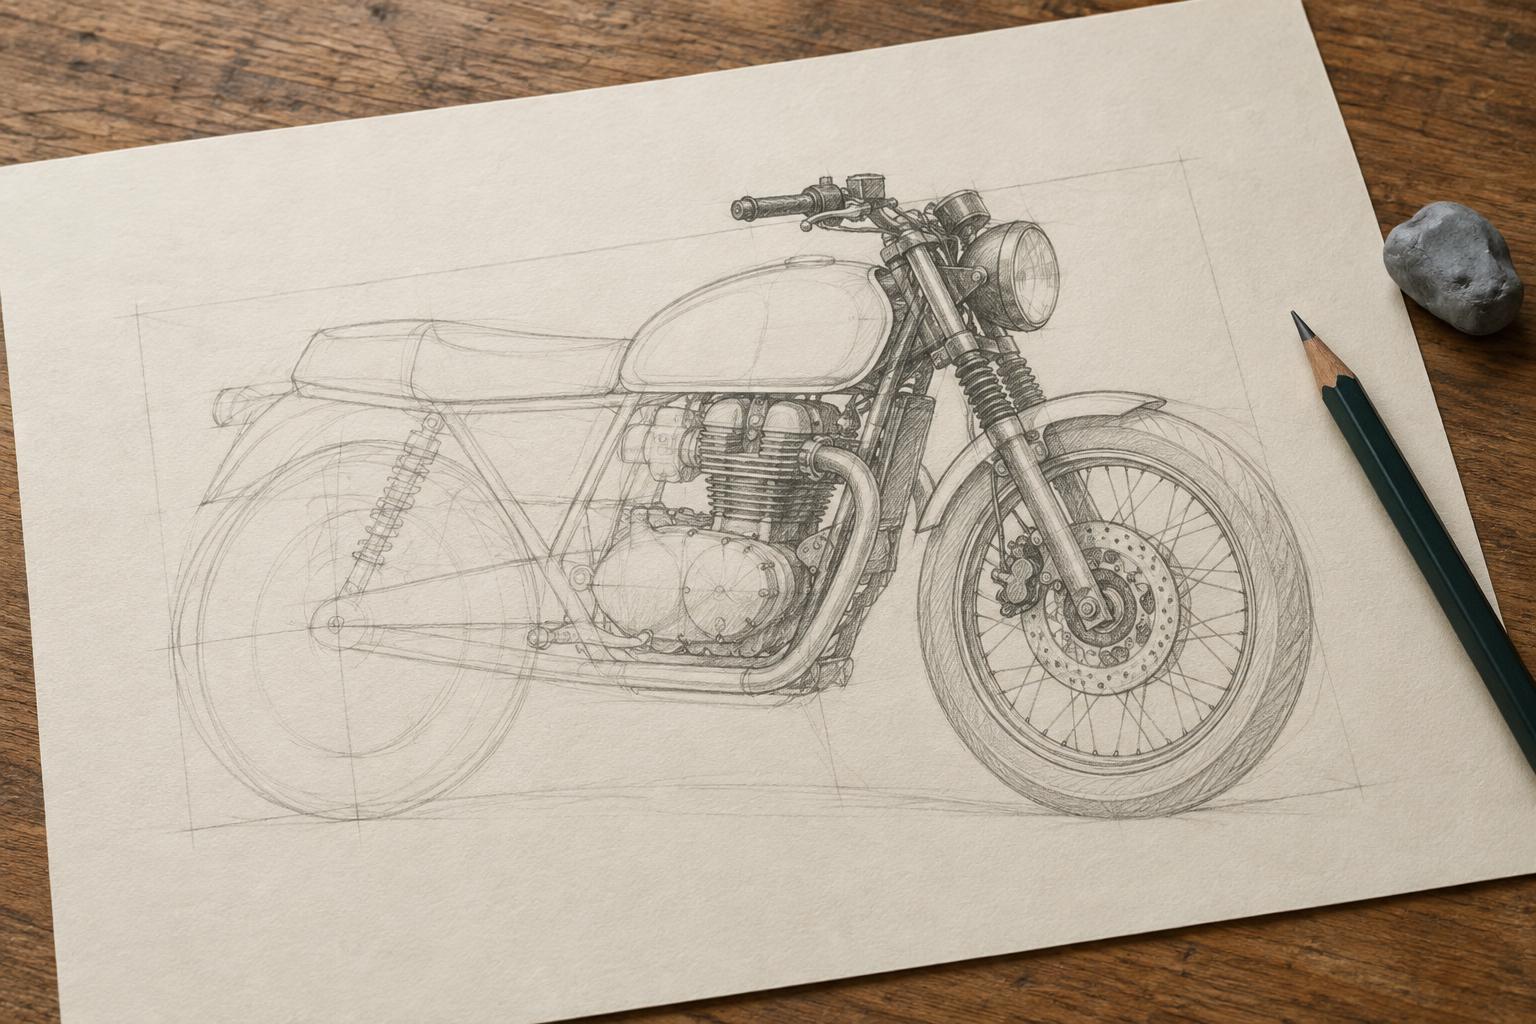
Lightly mark a rectangle around the whole subject. Find its highest, lowest, leftmost and rightmost points, including the mirrors or handlebars if they are visible. Then place the centers of the two wheels. Compare the distance between those centers with the height of a wheel. This gives you a simple proportion check before the frame, seat or engine adds visual clutter. Keep these marks faint enough to change as you work.
Build the wheels and main body
Draw the wheels as plain circles in a side view. If the motorcycle turns away from you, they may appear narrower, but avoid carefully rendering their rims until their size and position look convincing. Check whether both wheels rest on the same implied ground line. Even a small mismatch can make the vehicle seem to tip or float.
Next, place a broad shape for the body between the wheels. Think of the fuel tank and seat as one upper mass for now, then add a smaller mass for the engine below it. Look for the overall angle running from the front of the bike toward the back of the seat. You do not need to name every part to draw its position: compare where one shape begins and ends in relation to the wheel centers.
Step back and inspect the silhouette. If you filled the entire sketch with one dark color, would the handlebars, seat, wheels and body still suggest a motorcycle? If not, adjust their relative sizes before moving on. A readable outer shape does more work than a collection of accurately copied bolts.
Connect the shapes with a few structural lines
Once the large forms feel settled, add the most important connections. Locate the front fork between the handlebars and front wheel. Place the frame or lower body so it visibly relates the engine area to the rear wheel. Keep these as simple lines and blocks; their job is to explain how the big masses fit together, not to reproduce every mechanical component.
Use overlaps to clarify what sits in front. A tank may cover part of the frame, while a fender may cross the top of a wheel. Draw the nearer edge clearly and let hidden lines stop rather than showing every shape through every other shape. If a connection is confusing, look back at your reference and ask which visible edge helps the viewer understand the arrangement.
At this stage, turn the page or step away for a moment. Check three questions: Do the wheels look related in size? Does the upper body sit believably between them? Can you follow the main connections without relying on tiny details? Fixing any of these now is easier than correcting them after darkening the drawing.
Add selective detail and try a second sketch
Choose a few details that give this particular motorcycle its character: perhaps the shape of a headlight, the angle of an exhaust pipe or the outline of a storage case. Add them from large to small, and leave out details that make the sketch harder to read. For spokes or repeated engine marks, a restrained suggestion is often enough. Strengthen only the lines you want to keep, then erase construction marks where they distract.
For another subject or silhouette to practice, browse Motocykl od Podstaw for motorcycle-themed ideas and choose an image you can study closely. If you would rather practice placing a vehicle within a setting, browse Podróże motocyklowe · Motocykl od Podstaw for a journey-themed prompt, then begin with the vehicle and the simplest shapes of its surroundings.
Repeat the exercise with a different view, using the same order: outer limits, wheel centers, body masses, connections and selective detail. Compare your two sketches by looking at their proportions and clarity, not by counting how many parts you included. The aim is to make a complicated object manageable before asking your pencil to describe its finer features.