Start with the plane, not the oval
An ellipse is what a circle can look like when its plane tilts away from the viewer. Imagine a round coaster held directly in front of your eyes: its outline looks circular. Tip its top edge away, and the outline looks flatter. Turn it almost edge-on, and it approaches a line. When drawing an ellipse, the first question is therefore not “How wide should the oval be?” but “Which way is this circular plane facing?”
Try holding a cup at different angles. Its rim gives you an ellipse you can observe, while the body helps you see how that rim belongs to a solid form. The ellipse should have smooth, rounded ends and a continuous curve. Avoid joining two curved sides at sharp points, which can make a round opening look like a leaf.
Give the cylinder a clear direction
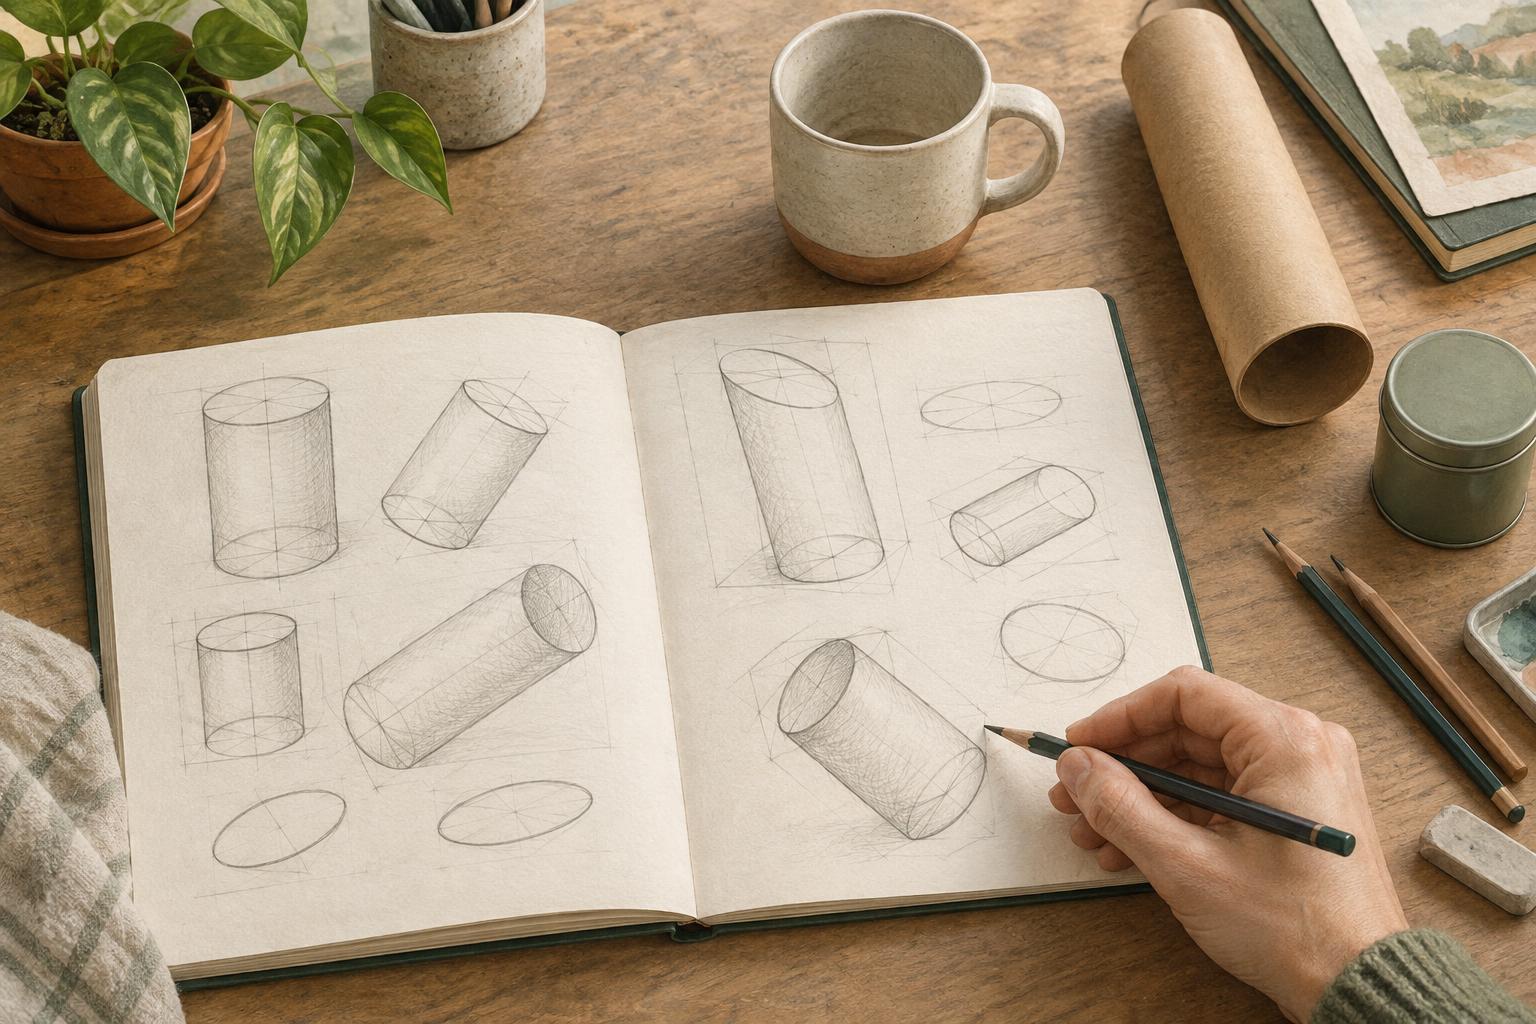
A cylinder has two circular ends connected by straight sides. Before drawing either end, lightly mark a line through the length of the form. This centerline establishes its direction and gives you a guide for placing the ends. Add simple marks for their approximate centers, then sketch each ellipse around its mark. For an everyday drawing exercise, the ellipses’ narrow direction should broadly follow the cylinder’s centerline.
Connect corresponding edges of the two ellipses to form the sides. Check that these edges feel consistent with the direction of the cylinder: they should not twist or attach to mismatched points on the ends. If one end is farther away, it will generally appear smaller. Keep that change in size related to the length and angle of the form rather than shrinking the far end at random.
A light bounding box can help when the cylinder sits at an unfamiliar angle. Draw a box that suggests the overall length, width and height, then fit the circular ends inside its end planes. The box is scaffolding, not a shape you need to preserve in the finished drawing.
Choose the right amount of opening
Artists often describe an ellipse’s apparent openness as its degree. A broad ellipse has a high degree; a narrow, flattened ellipse has a low degree. To choose one, imagine the circular end as a flat disk. If you can see much of the disk’s face, draw a broader ellipse. If you are looking nearly across its surface, draw a narrower one.
The two ends of a cylinder do not always need identical ellipses. In a long form pointing toward or away from you, their planes may meet your line of sight at slightly different angles, making one opening appear broader than the other. In a short form viewed from a distance, the difference may be barely noticeable. Observe the particular angle you are drawing instead of applying a fixed rule to every cylinder.
When an object hides part of its far end, sketch the full ellipse lightly before erasing the hidden portion. This helps the visible arc remain part of a complete, believable circle rather than becoming an unrelated curve.
Use a repeatable drawing sequence
Begin with loose, pale construction lines. First mark the cylinder’s centerline and the positions of its ends. Next, indicate the approximate width of each end. Draw through each ellipse with a few smooth passes rather than trying to perfect its outline in one slow stroke. Then add the side edges, check the whole form, and darken only the lines you want to keep.
Look for three common problems before adding detail. Are the ellipses tilted in ways that suggest different directions? Do their curves pinch at the ends? Do the side edges meet the ellipses abruptly, creating a kink? Correcting these structural issues will usually do more for the drawing than adding shading.
Once the outline works, a few interior lines can clarify the object. A cup may need a second ellipse to show the thickness of its rim; a tube may need an opening at one end. Draw those details in relation to the main ellipse so they reinforce the same plane.
Practice with ordinary objects
Fill a page with short cylinders before tackling a finished illustration. Draw some upright, some sideways and some angled toward you. Vary how open their ends appear. On another page, draw rows of ellipses inside lightly marked rectangular planes, aiming for smooth curves that fit each plane without pointed tips.
Then move to objects with a purpose: a mug, a roll of tape, a pencil barrel or a stack of coins. Start by identifying the underlying cylinders and ellipses before adding handles, labels or texture. Comparing your construction with the object can show whether an opening is too flat, an axis has drifted or a far end is misplaced. These small checks turn perspective from a guessing game into a drawing habit.