Start with the hand’s overall direction
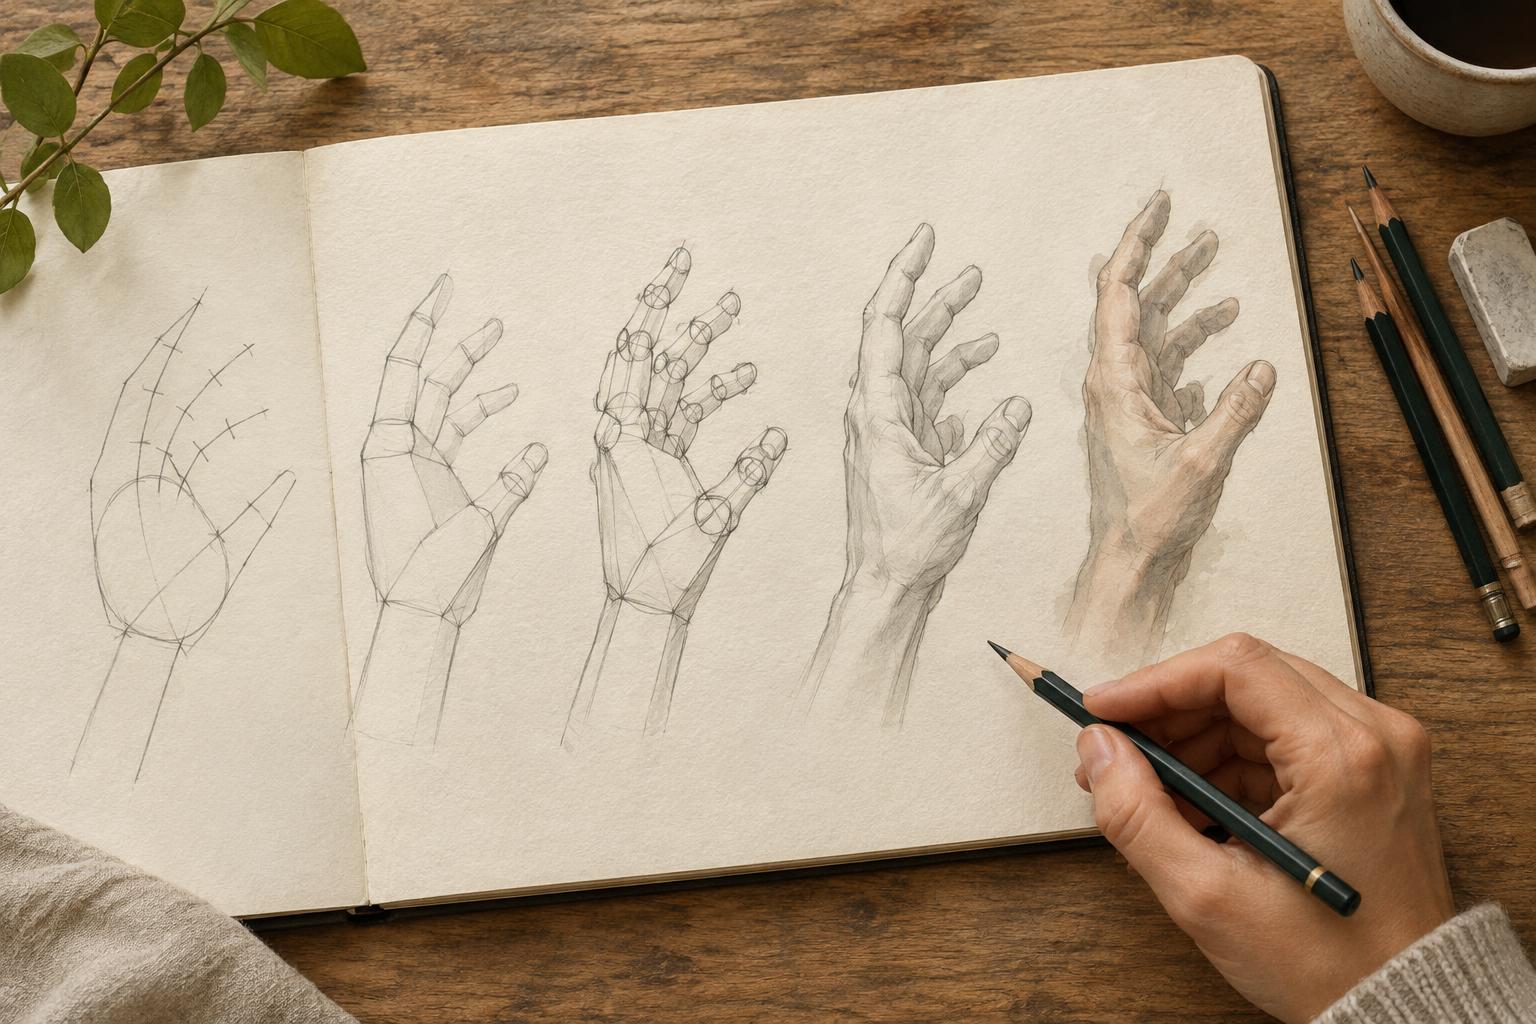
A convincing hand drawing begins before any fingers appear. Look at the whole hand and decide what it is doing: reaching, resting, gripping, pointing, or supporting weight. Lightly mark a line from the wrist through the palm toward the middle fingers. This line gives the drawing a direction, even when the hand is tilted or partly hidden.
Next, sketch a loose shape around the entire hand, including the thumb. Check its height, width, and angle. Is the palm facing you, turned sideways, or pointing away? These broad decisions matter more at first than the precise contour of a fingertip. If the overall shape is too narrow or the wrist enters at the wrong angle, detailed fingers will not rescue it.
Build the palm as a flexible block
Treat the palm as a simple block or flattened wedge. Mark the wrist as the narrower end and the row of knuckles as the wider end. The palm is not a rigid rectangle: its thumb side and little-finger side have different contours, and it can bend or cup. Still, a block gives you a surface on which to place the fingers.
Draw a line across the knuckle row, then notice its slope. In many views, the knuckles do not sit on a perfectly straight horizontal line. The middle-finger knuckle often projects farther than its neighbors, while the little-finger side sits lower. Use what you can see in your reference rather than forcing every hand into the same pattern.
Before moving on, check the block against the empty spaces around it. The gap between thumb and palm can be as useful to observe as the palm itself. Leave your construction lines light so you can shift an edge or change the tilt without having to protect a finished outline.
Place joints before drawing finger contours
Mark each finger’s path with a simple line starting at its knuckle. Add small dots or short strokes for the visible bends. These marks act like a map: they show where a finger changes direction before you give it thickness. A relaxed hand may have fingers that fan apart slightly, while a gripping hand may bring them closer together.
Think of each finger as a chain of short segments, not one smooth tube. The lengths and angles vary, so compare them with one another and with the palm. Fingers generally narrow toward their tips, but avoid reducing them to needles. Block each segment with a narrow box or rounded cylinder, then connect the forms with a lighter contour.
When a finger points toward the viewer, its segments may look short because they overlap. Do not lengthen it just because you know how long a finger is. Look for the visible fingertip, the bends that remain in view, and the shape of the overlap. A few well-placed joint marks can explain the pose more clearly than a heavily outlined finger.
Give the thumb its own structure
The thumb needs a separate plan. It branches from the side of the palm and can swing across it, away from it, or toward the viewer. Begin with a broad shape for the fleshy base, then mark the thumb’s direction and visible joint. This helps prevent the common mistake of attaching it like a fifth finger to the knuckle row.
Check the space made by the thumb and index finger. In an open hand, that space may form a prominent wedge. In a pinch or grip, it may nearly disappear. Sketching this negative space can help you find the thumb’s angle without overworking its outline. If the thumb crosses in front of the palm, make that overlap clear; the viewer needs to know which form is closer.
Practice the construction, then simplify
Try a page of small hand studies using a mirror, your own free hand, or a stationary reference. Give each study the same sequence: overall direction, palm block, knuckle row, joint marks, finger forms, then thumb. Keep the early marks visible while you work. They make it easier to see whether a confusing result began with the pose, the palm, or the placement of a joint.
Vary the pose rather than repeating only a spread hand. Draw a loose fist, a hand holding a simple object, and a hand seen from the side. In each study, pause before adding nails, creases, or shading. Ask whether the palm faces the right way and whether the fingers appear connected to it. Once the construction reads clearly, refine only the contours and details that help describe the gesture.