Two ways to build a value
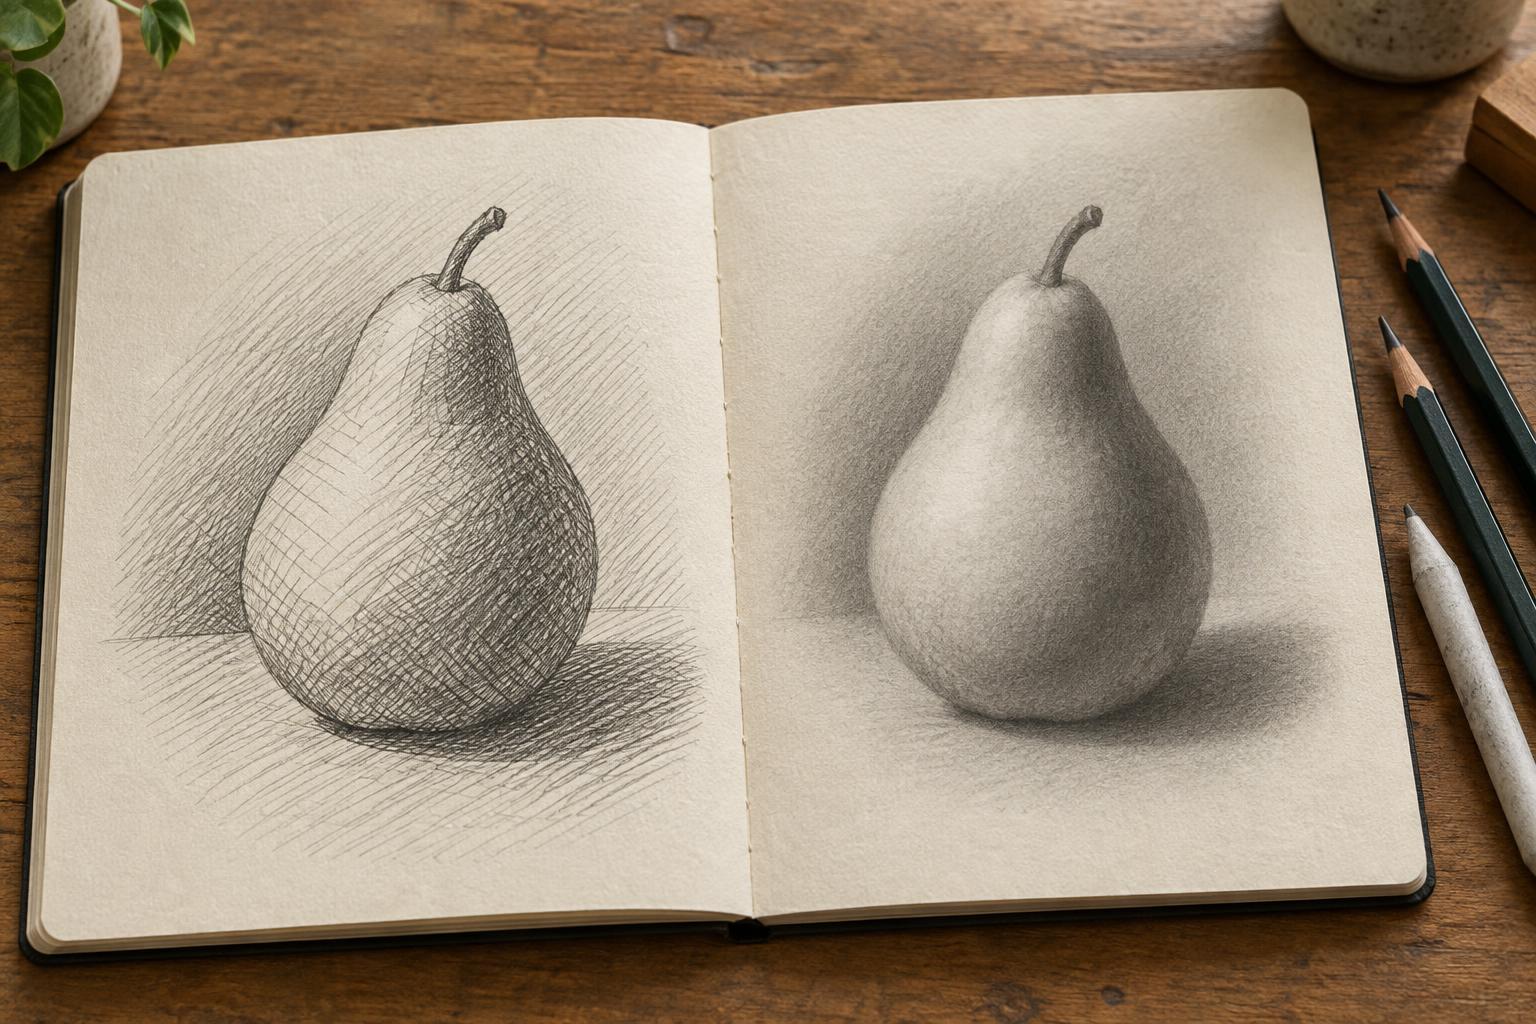
A pencil study often begins with the same question: where is the light, and how dark does each part of the subject need to be? Hatching and blending offer different ways to answer it. Hatching creates tone from repeated, visible strokes. Blended shading lays down graphite and softens the marks into a more continuous-looking surface. Neither method is inherently more realistic or more finished. Both depend on accurate observation and a clear range of light and dark values.
The difference matters because each method changes what you notice while drawing. Hatching asks you to choose a direction and spacing for your lines. Blending asks you to control gradual transitions without losing the edges that describe the subject. A good pencil study need not commit to one method throughout, but practicing them separately makes their strengths easier to recognize.
What hatching makes visible
To hatch, draw a set of strokes close enough that they read as a value from a short distance. Darken an area by placing the strokes closer together, increasing pressure carefully, or adding another set at a different angle. That second set is cross-hatching. Start with light pressure so that later layers remain possible; pressing hard at the outset can flatten the paper surface and limit how much tone it will accept.
Line direction can help explain form. On a rounded mug, strokes that follow the curve can reinforce its shape. On a flat tabletop, straighter, more consistent strokes may make the plane feel stable. Hatching also keeps the drawing’s construction legible: you can often see where a shadow was built, adjusted or left open for reflected light.
Its main difficulty is consistency. Uneven gaps or sudden changes in stroke direction may attract attention to the marks rather than the subject. Before adding more lines, step back and ask whether the area reads at the intended value. A dense patch of careful marks will not solve a shadow that is placed incorrectly.
What blending makes possible
Blended shading is useful when a subject has broad, quiet transitions, such as the turn of a cheek or the curved side of a ceramic bowl. Build a light graphite layer first, then soften it with a clean blending stump or a small piece of tissue. Use a light touch and work gradually. The blending tool moves existing graphite; it does not replace the need to draw the right value in the right place.
A common problem is making every edge equally soft. A cast shadow may have a relatively firm boundary near the object and a softer one farther away, while the edge between two gently turning planes may barely be visible. Compare those edges before blending across them. Keep a clean area of paper for the brightest lights rather than trying to recover every highlight after it has been covered.
Paper affects the result. A toothier sheet can hold visible grain and make perfectly smooth blending difficult, while a smoother sheet may show pressure changes more readily. Neither is a fault. Test a few strokes in a margin or on a spare sheet before deciding how much graphite and blending the paper can comfortably take.
A side-by-side study
Choose one simple object under a steady light: an egg, a folded piece of paper or a plain cup will do. Draw two small outlines of the same view. In both, mark the lightest area, the darkest shadow and the main transition between them before shading. Keep those value decisions as similar as you can so the technique, rather than a different lighting plan, becomes the comparison.
Shade the first drawing with hatching only. Leave small gaps between the lightest strokes, and add layers where the values deepen. Shade the second with a light graphite layer and blend it in stages. Reapply pencil where the darkest areas need more depth. Work on both studies for roughly the same amount of time, then view them from across the room. Ask which shapes read clearly, where an edge has disappeared, and whether either study has become darker than the subject suggests.
Choosing and combining the methods
Use hatching when you want energetic marks, a clear sense of drawing process, or help describing directional surfaces. Use blending when a smooth transition is important and visible strokes would compete with it. For a mixed approach, try blending a broad half-tone, then adding selective hatching to a dark crease or textured surface. You can also hatch most of a study and soften only the areas where a hard pattern of lines interrupts the form.
Treat technique as a way to clarify what you see, not as a finish to apply everywhere. If a drawing feels flat, check the value structure before changing tools. If it feels busy, simplify the marks. The most useful result of comparing hatching and blending is not choosing a permanent favorite; it is learning which marks help a particular subject become easier to read.