Start with a small family of motifs
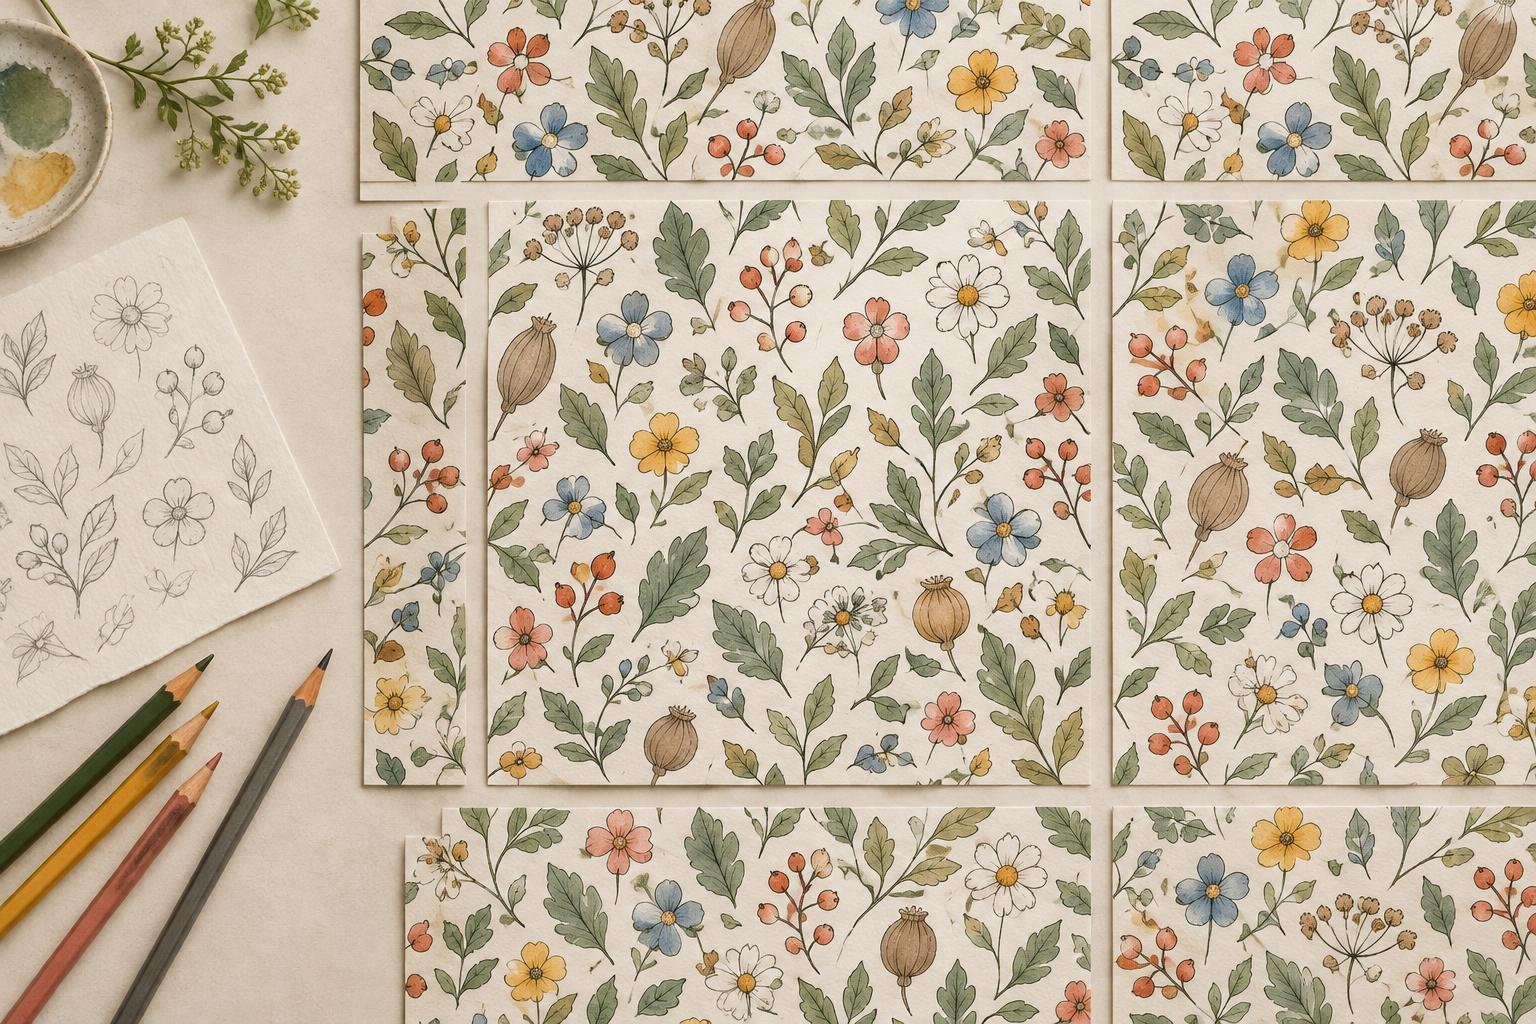
A repeating pattern begins with a collection of marks that can share a visual space. Choose a simple subject, such as leaves, kitchen objects or abstract shapes, and draw several versions of it. Change the scale, angle and silhouette rather than making identical copies. A few small supporting marks, such as dots or short lines, can help fill gaps later without making the pattern feel crowded.
Before arranging anything, decide what should hold the drawings together. Consistent line weight, a limited color palette or a shared level of detail can make varied motifs feel related. Keep your sketches separate at this stage. You will have more freedom to rotate and move them once you begin building the repeat.
Prepare a tile you can edit
The tile is the rectangular area that will be copied side by side and above and below itself. A square is convenient for a first attempt, but a rectangle works just as well. Draw on paper and scan or photograph the motifs, or draw them directly in a digital document. If you work from a photo, straighten the image and clean up uneven lighting before isolating the drawings.
Place each motif on its own layer if your software allows it. This makes it easier to adjust spacing without erasing neighboring marks. Leave the tile background on a separate layer, too. You can then try different colors without altering the original drawings. If you prefer an entirely paper-based process, make copies of your motifs so you can cut out and rearrange them.
Make opposite edges agree
Begin by placing a few larger motifs inside the tile, leaving room around them. Next, put one motif across an edge. The part extending beyond the right edge must continue from the same position on the left edge. Likewise, anything crossing the bottom must continue at the top. In a digital document, duplicate an edge-crossing motif and move the copy exactly one tile width or height. Avoid estimating the distance by eye: even a small mismatch may show once the tile repeats.
A cut-and-shift method is useful for a paper tile. Draw the central motifs first, then cut the tile into quarters through its midpoint. Swap the left and right halves, then the top and bottom halves, and tape the pieces together without gaps or overlap. The original outer edges now meet inside the tile, where you can draw into the newly exposed empty area. When you repeat the finished tile, keep the pieces aligned in that shifted arrangement.
For motifs near a corner, check both directions. A mark that crosses the top-right corner needs matching parts at the top-left, bottom-right and bottom-left. You can avoid this extra alignment on a first pattern by keeping motifs away from the corners.
Balance the spaces between drawings
A seamless edge does not automatically make a pleasing pattern. Look for accidental rows, unusually wide gaps and tight clusters that pull attention away from the rest of the design. Rotate some motifs or vary their size to interrupt a rigid arrangement. Add small supporting marks only where they improve the rhythm; filling every open space can make the repeat harder to read.
It also helps to look at the empty spaces as shapes of their own. If one diagonal channel runs through the tile, it may become much more obvious when repeated. Move a motif or two, then check again. Unless a strict grid is your goal, aim for spacing that feels consistent without looking mechanically uniform.
Test the repeat, not just the tile
Make a preview with at least three copies across and three down. Zoom out until the individual tile boundary is difficult to see. Can you spot a square outline, a blank stripe or a motif that repeats too prominently? Then zoom in and inspect every join for cut-off lines, mismatched color or tiny gaps. Fix the tile and refresh the preview rather than patching the repeated copies individually.
Finally, view the pattern at a size close to its intended use. Fine details that look charming up close may disappear when the design is small, while bold motifs may feel overwhelming when enlarged. Save an editable version with separate motifs and background, as well as a flattened tile for repeating. That leaves you room to revise the spacing or palette without starting the drawings again.