Build a head that can turn
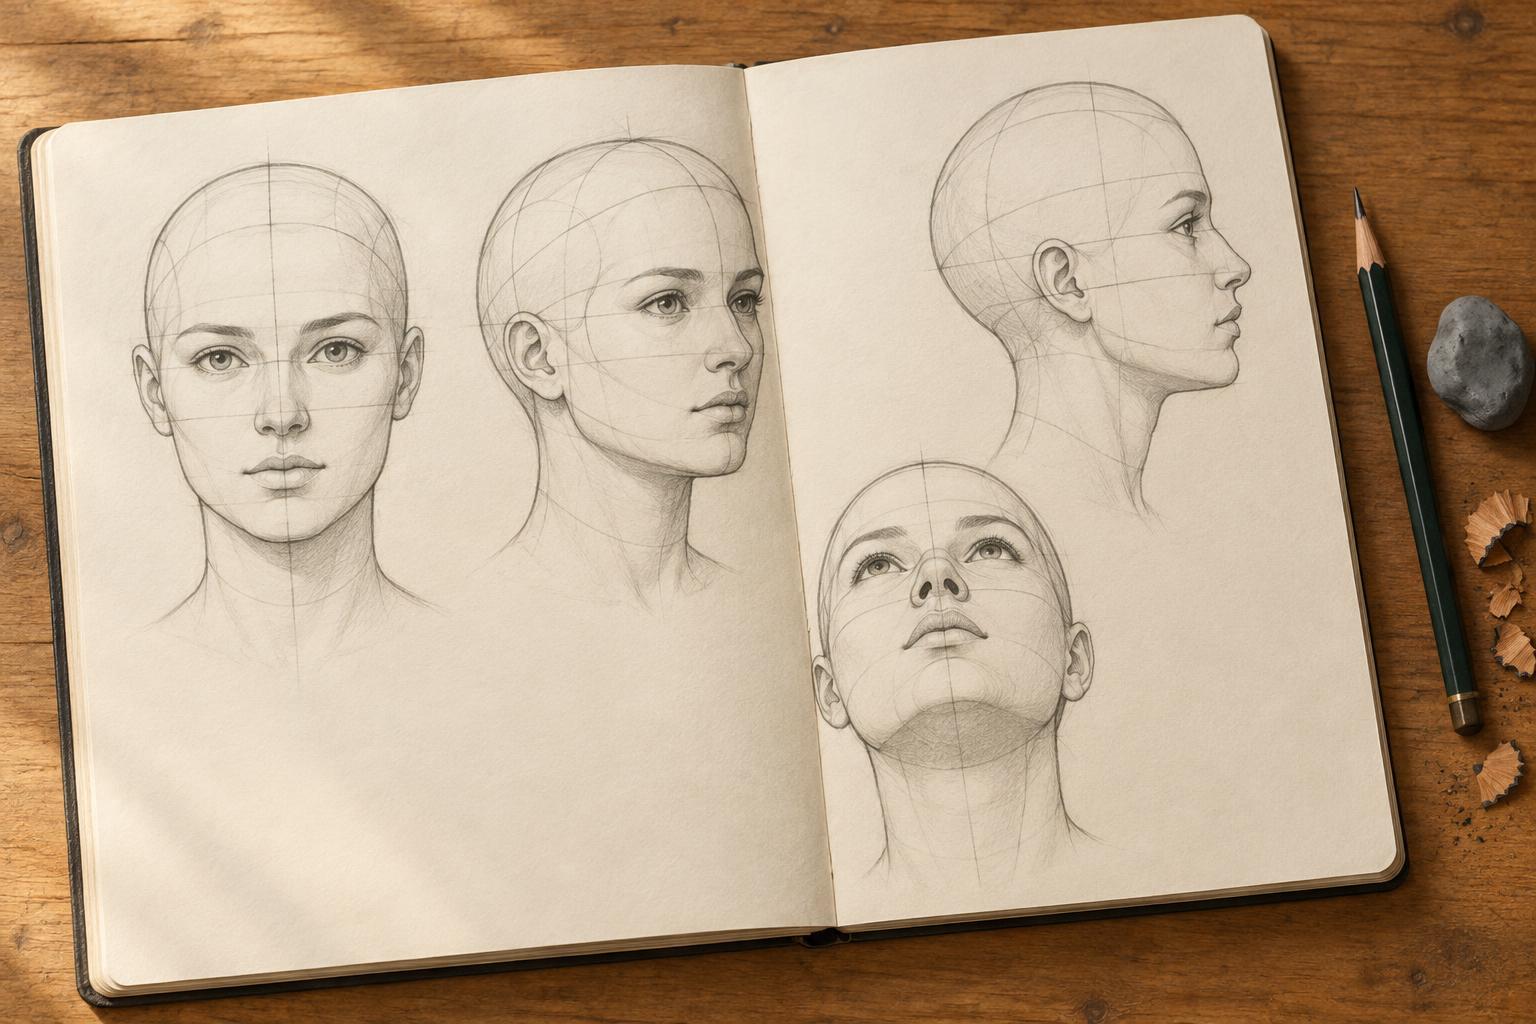
When a face changes angle, its features do not simply slide around an oval. They sit on a three-dimensional head, so their visible shapes and spacing change as that head turns. Before drawing an eye or a mouth, sketch a loose cranium and attach a jaw. A circle with a tapered lower section is enough for practice; it need not become a polished construction diagram.
Next, draw a centerline from the top of the forehead area, down the face and toward the chin. Imagine this line lying on the surface of the head. It will appear fairly straight in a front view, curve toward one side in a three-quarter view and approach the visible edge in profile. Add an eye line that wraps around the head at a right angle to the centerline. These two guides establish the direction the face is pointing before individual features complicate the drawing.
Use landmarks as starting points, not rules
In a straightforward front view, the eyes sit across the same general level, with the nose below and the mouth between the nose and chin. The ears often occupy roughly the height between the brow area and the base of the nose. These are useful checks, not measurements to impose on every person. Age, expression, style and individual anatomy all affect the spacing.
Mark the brow, base of the nose and chin with light strokes before refining the features. Look at the intervals between them: a mouth can seem misplaced even when its shape is convincing if the space above or below it feels inconsistent. For a more stylized face, decide which intervals you want to stretch or compress. Keeping the underlying landmarks related to one another helps the exaggeration feel intentional.
Turn the face into three-quarter view
A three-quarter view reveals both the front and one side of the head. Shift the surface centerline toward the side the face is turning away from. The portion of the face nearer the viewer usually takes up more of the visible width; the far side appears narrower. Do not place the two eyes at equal distances from the centerline as though the face were still facing forward.
Draw the nose as a form projecting from the face, not just a mark placed on its outline. Its bridge and tip may interrupt the view of the far eye or cheek, depending on the turn. The mouth wraps across the front of the muzzle area: its far corner may be less visible, but it should still relate to the direction established by the eye line and centerline. Place the visible ear on the side of the cranium rather than on the front plane of the face.
If a three-quarter face looks twisted, temporarily hide the features with a scrap of paper and inspect the head shape and guides. A convincing set of eyes cannot rescue a cranium pointing one way and a jaw pointing another.
Handle profiles and tilts separately
In profile, the front and back of the head become especially important. The forehead, nose, lips and chin create a sequence of overlapping contours, while the ear sits behind the jaw hinge. Avoid squeezing the eye, nose and mouth into a narrow vertical strip at the front edge. Leave room for the brow and cheek to connect those features to the larger head.
Looking up or down adds a different kind of turn. When the head tips downward, the brow may obscure more of the eyes, and the upper planes of the head become easier to see. When it tips upward, the underside of the nose and chin may become more prominent. Let the eye line curve with the tilt, and check that the nose and mouth follow the same orientation. Thinking about which planes face the viewer is more dependable than memorizing a separate feature formula for every angle.
Practice the turn before adding detail
Draw a row of five simple heads, rotating gradually from front view through three-quarter view to profile. On each one, add only the centerline, eye line, nose base, mouth line and ear position. Keep the heads similar in size so you can compare how the visible spacing changes. Then repeat the row with the heads tilted slightly up or down.
For a second pass, choose one head and draw it with different expressions. Notice that raised brows, narrowed eyes and an open mouth alter feature shapes without changing the head’s overall direction. Work lightly until the construction feels coherent, then strengthen the lines that describe the final face. The goal is not perfect symmetry or a universal set of proportions; it is to make every feature appear attached to the same turning head.