What a cross-contour line describes
An outer contour marks the visible edge of a subject. A cross-contour line travels across its surface, as if you had drawn a stripe on the object. On a round fruit, that stripe might curve around the bulge. On a bent leaf, it might change direction as the leaf twists. The purpose is not to decorate the drawing, but to ask a useful question: which way does this surface face at each point?
Imagine wrapping a narrow strip of paper around a mug. Seen from the side, the strip would appear as a curved line across the mug’s body. If you moved the strip toward the top or bottom, its visible shape might change. Thinking this way helps you draw a form as something with depth, rather than filling an outline with marks.
Start with a simple object and a few lines
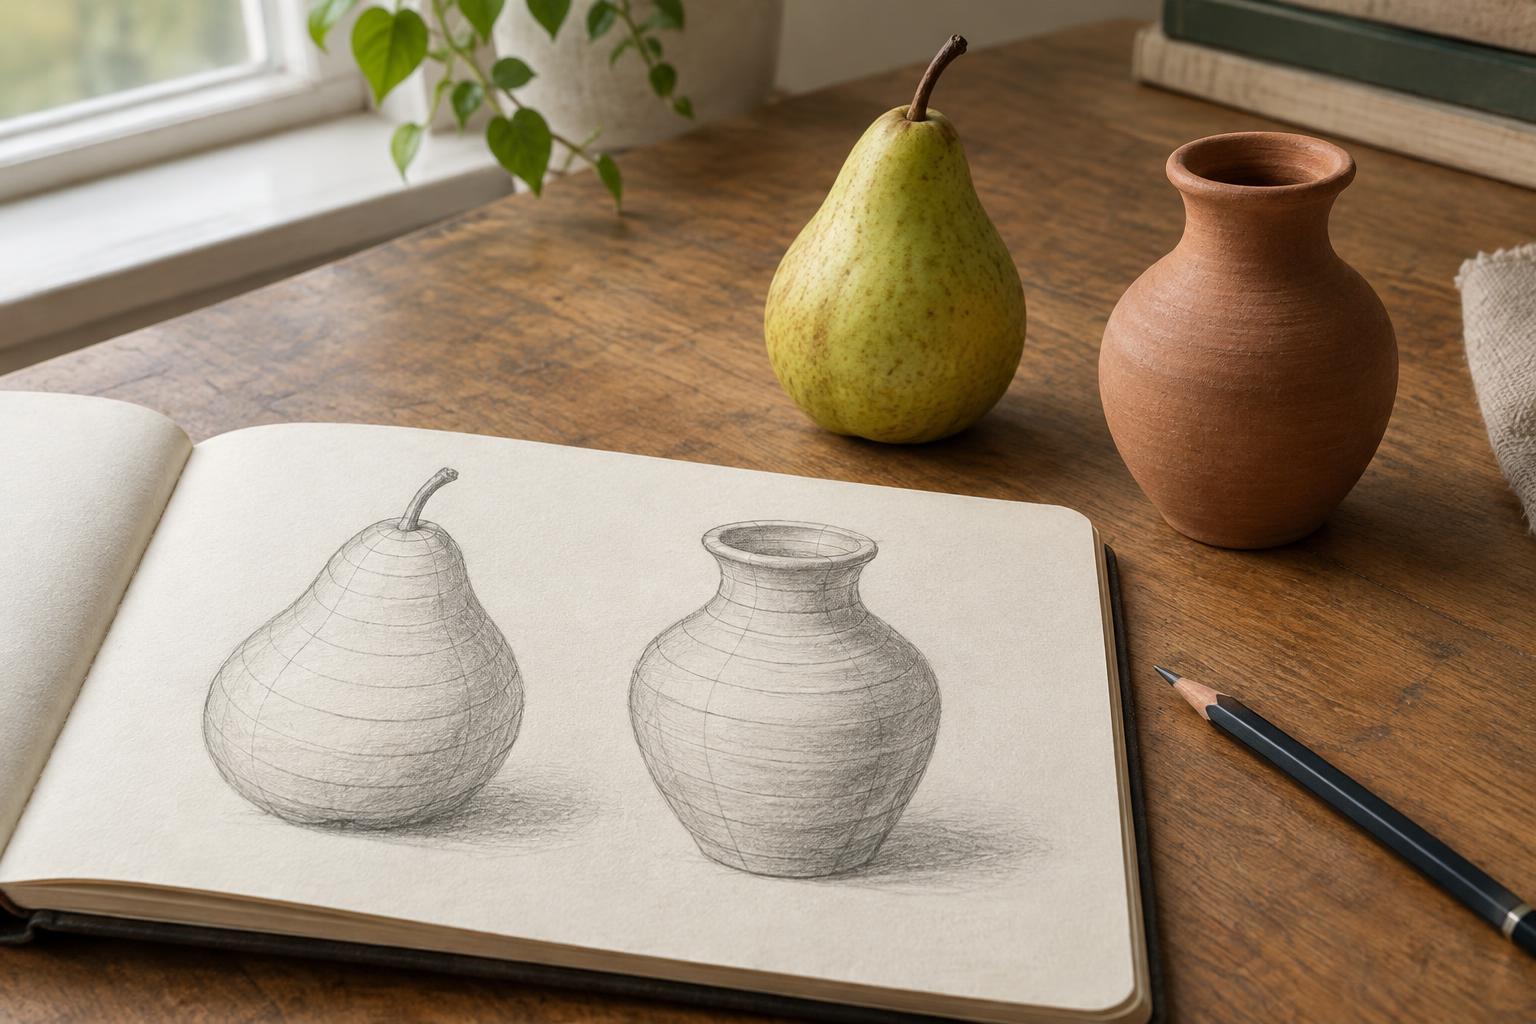
Choose an object with a clear surface, such as a pear, a rolled towel, or a smooth stone. Place it where you can observe it without moving it during the exercise. Lightly draw its overall shape, leaving out texture and small details. Then add three or four cross-contour lines. Space them far enough apart that you can consider each one individually.
Before drawing a line, trace its imagined path with your eyes. Ask where it would enter the visible surface, how it would bend across the form, and where it would disappear around the far side. On a pear, lines across the wide body may have a different curve from lines near the narrow neck. Let what you see guide those differences instead of repeating one tidy arc.
Keep the marks light at first. A cross-contour is a thinking tool, so it can be revised. If a line makes a bulge look hollow or a narrow area look wide, redraw its path. You can leave the final study as a diagram, or erase some of the guide lines before developing the drawing further.
Use line direction to test the form
Cross-contours are especially useful when an object changes direction. Consider a ribbon that turns over, or a sleeve that bends at the elbow. One line can describe the surface before the turn; another can describe it after. If the lines all face the same way, the drawing may read as flatter or straighter than the subject. Changing their direction makes the shift in form easier to examine.
The spacing between lines also deserves attention. Evenly spaced marks can be helpful for a basic study, but they are not a rule for every object. A long, quiet area may need few lines, while a tight bend may benefit from two nearby lines that clarify the transition. Add only enough to explain the form. Too many dark lines can compete with the outer shape and make the study difficult to read.
If you are unsure how a line should curve, try drawing the object as a simpler volume for a moment. A bent branch might be understood as a series of connected cylinders; a lumpy stone might be considered as several rounded masses. This is a temporary aid, not a demand to make the finished drawing look geometric. Return to observation to adjust the simplified idea.
Try a short comparison exercise
Draw the same object twice on one page. For the first drawing, use only its visible outline and one or two important interior edges. For the second, begin with the same outline, then add a small set of cross-contours. Compare the results. Where do the extra lines clarify a bulge, turn, or taper? Where do they add little? This comparison teaches you to use the method selectively.
Next, change your viewing angle and repeat the exercise. A line that looked nearly straight from one position may look more curved from another. This is a reminder that cross-contours describe both the object’s surface and your view of it. They are not a fixed pattern that can be copied onto every drawing of the same subject.
Cross-contour studies do not need to become finished illustrations. Their value lies in slowing down your interpretation of a surface. Once you can picture how a line would travel around a form, you may find it easier to place details, shading, or texture without losing the object’s sense of volume.